If you’re a beginner who wants to teach yourself how to draw accurate pictures, here are some tips to help you get started
“Being an artist is the same as being a wizard…only instead of a wand we use a pencil.”
~ Kristina Webb
As an artist, there’s nothing I love more than a good doodle. It really is one of the most enjoyable past times that you can easily enjoy and do pretty much anywhere, whether during long bus rides for work or hidden away in your sketchbooks. You can get started from your desk at school or at your local cafe at lunch time and even from the comfort of your own home with just a pack of cheap pencils and some paper. And lucky for you, learning how to draw doesn’t have to be challenging with these simple tips!
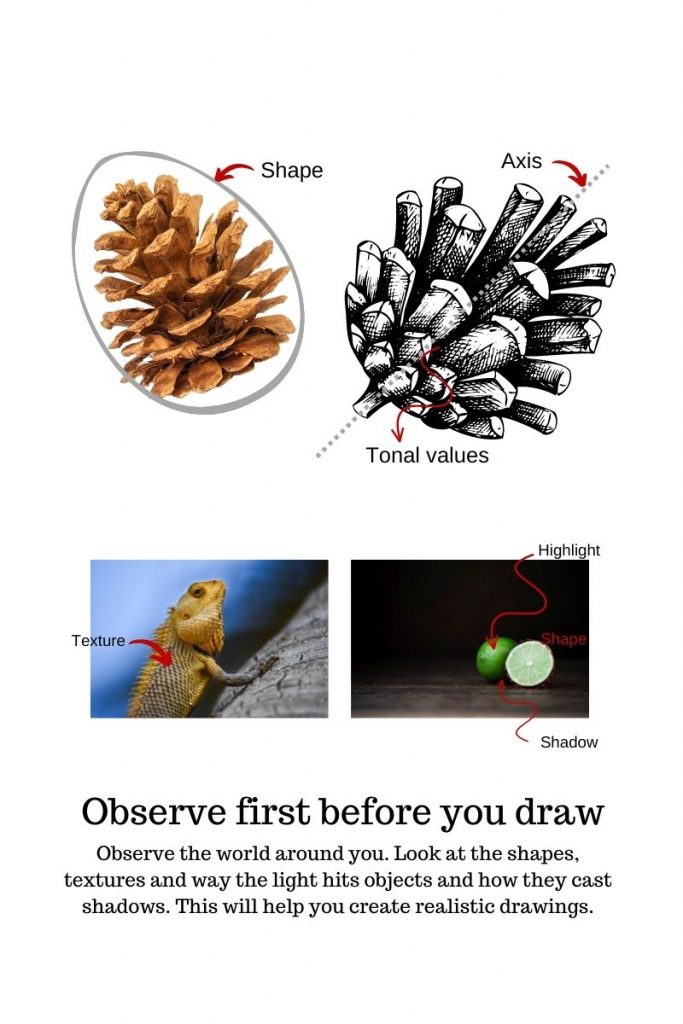
1. Observe the details of the drawing subject or photo
Before you begin, observe the subject well, paying attention to all details from the basic shapes that form the overall subject, the textures of materials to small details like shading and lighting is important if you want your drawing to look realistic. For example, look at how light reflects off skin, hair, or objects in a still-life or how shadows are cast on other objects nearby. These are all part of what makes something look realistic in real life!
2. Begin with construction lines
Why draw construction lines?
Drawings that are based on the concept of construction results into more accurate representations of the subject. As professional artist and educator Matt Fussel (2022) explains,
“We can compare the process of drawing construction with that of constructing a house. A house needs a foundation and a structure before the finishing touches are added. Of course, all we see are the finishes, but a complex structure exists underneath. Without the underlying structure, the house would not stand. Our drawings also need an underlying structure. And by starting with the structure, we can ensure that our drawings are more accurate.”
Source: Fussell M. 2022, https://thevirtualinstructor.com/blog/drawing-basics-construction#:~:text=Construction%20is%20basic%20principle%20of,and%20increases%20our%20drawing%20speed.
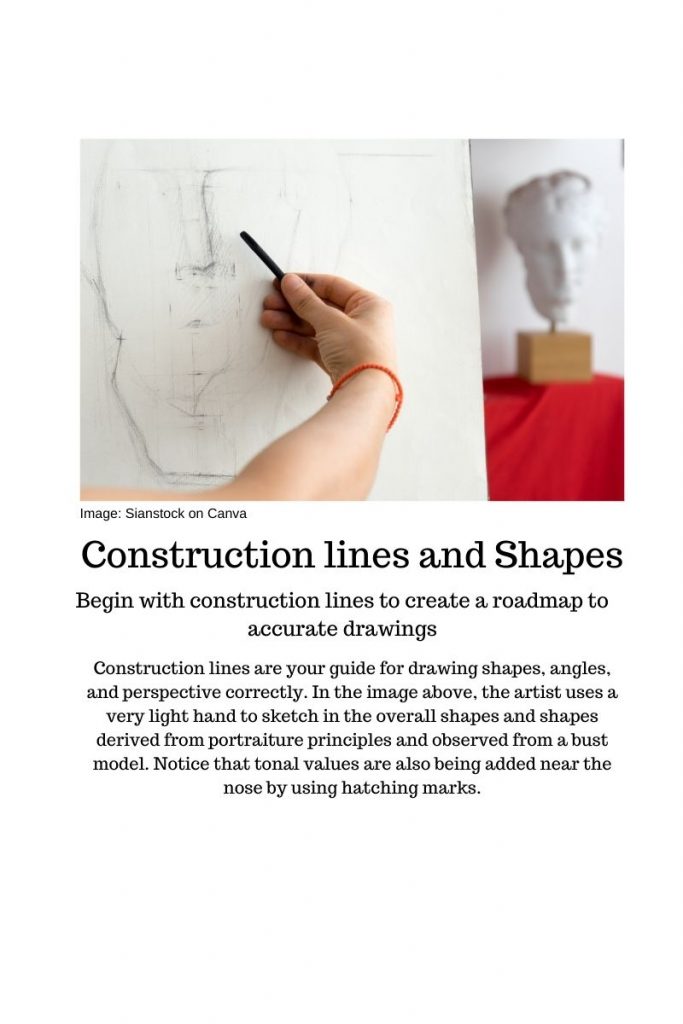
USE CONSTRUCTION LINES FOR MORE ACCURATE DRAWINGS
Construction lines are your guide for drawing shapes, angles, and perspective correctly. Drawing these in first help you create a proper foundation for your drawings. Think of it as a way of mapping out the path accurately to the completed drawing. Start by drawing tentative lines, shapes, or outlines on your paper with a light touch, positioning them in such a way that the overall subject fits the surface and forms a general outline of all the elements you intend to include.
When drawing a landscape, for example, you will mark the horizon and foreground lines. Next, mark the position using shapes for all other elements such as clouds and hills near the horizon, a subject that might be in the middle ground, and items of interest in the foreground. Once all the lines and shapes are in place, you will have a much-improved foundation upon which to build your drawing and a clear path to follow as you add details, textures, and tonal values.
3. Draw quick gesture sketches
Gesture sketches are quick sketches that get the general shape and feel of the subject down before you start making more detailed drawings. They can be helpful in getting the proportions right and can also help with shading later. Quick gesture sketches are useful for beginners because they allow you to capture the essence of your subject quickly without having to spend too much time on details. It also helps you understand how light interacts with various objects found in nature or around us in our daily lives. Since gesture sketches are quick drawings of an object or person in motion—they don’t have all the details that other types of drawings do because they’re meant more as a reference capturing the overall essence of the subject. Practicing gestural sketches can help you get used to drawing quickly so that when it comes time for more complex drawings later down the road (like portraits), those skills will already be ingrained into your brain by then!
4. Practice Perspective Drawing
Perspective drawing used by artists is the technique of using lines and shapes to create the illusion of depth in a 2D space meaning that makes objects appear farther away or closer than they are. It’s used almost universally in painting, architecture, and other forms of art.
You can practice drawing your own perspective by using grids or rulers while you draw, so that everything stays in proportion as you move it around on paper or canvas. Once you have got the idea ingrained in your mind, you can incorporate it into your drawings with ease often without the need for rulers and gridlines unless it’s an architectural subject.
5. Draw connected shapes, not disconnected shapes
This will make your drawings look proportionate, fluid, and cohesive. It’s very difficult to calculate the spaces and ratios between elements you want to draw such as “the distance from a tree at the horizon to one in the foreground” or the proportion of a bird’s head in relation to the body and positioning of tail unless you draw all the shapes in between. So, after positioning the placement and shape of the overall subject on the paper surface, work your way filling up the external shape with circle for the head intersecting with an ovoid or egg-shape for the body working your way back to overlapping the body with a triangle for the tail etc., so that you can judge each shape in relationship to the others. As professional artist Jordan C. explains,
“Draw anything with connectivity and chances are you will figure out mistakes faster and get to a cohesive whole quicker… that is, after guessing at the total height of a standing figure and establishing a scale for the drawing so that it fits on the sheet of paper, work your way down from the head to the shoulders, from there to the waist, on to the knees, etc, “
Source: Jordan C., 2022, https://www.artistsnetwork.com/art-mediums/drawing/6-tips-on-how-to-draw-anything-accurately/
6. Draw anything well by considering both positive as well as negative shapes.
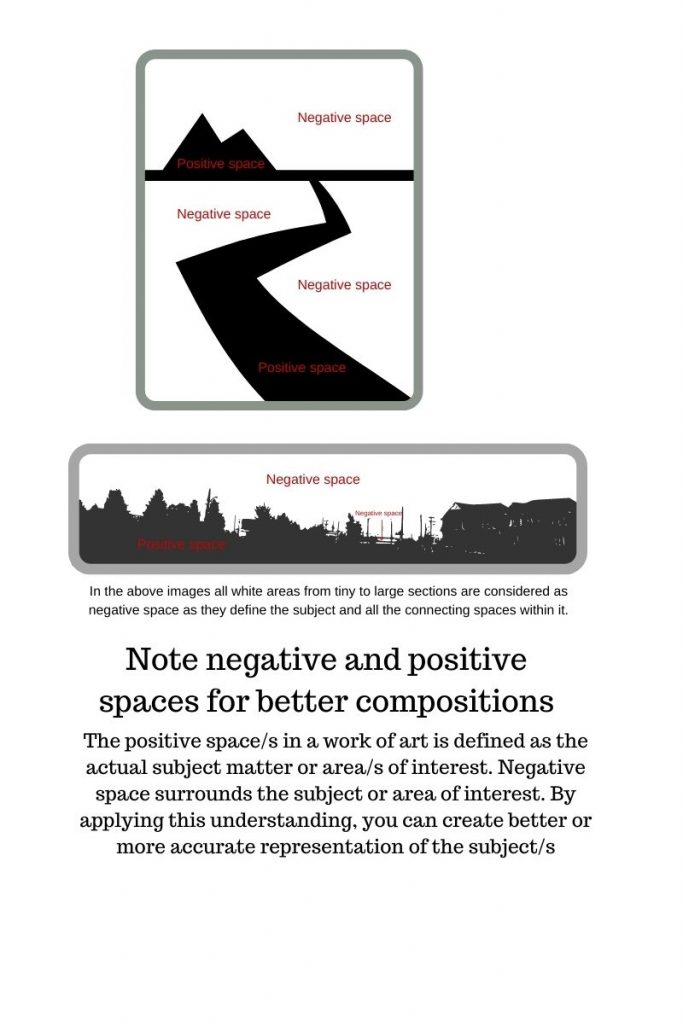
The area around and between the subject matter is just as important as the subject itself. Look at the photo or scene that you are trying to draw and look for shapes within it both within and around the subject. For instance, if you want to draw a tree, look at the shape of the branches and leaves, as well as the negative spaces between the foliage and the branches around it. Same technique can be used to determine spaces between objects in still life or profile of the horizon in a landscape. This will help you to create a more accurate drawing. In general, when drawing, it is helpful to deal with the negative space in the same way you deal with the positive shapes.
7. Use a light touch when you start drawing.
This is probably the most common complaint I hear from beginning students: their drawings look heavy and awkward. Why? Because they are pressing too hard on the pencil! A light touch will help you control your line quality better as you learn to draw. You can always darken the lines later, but it’s much harder to erase heavy pencil marks. Light pencil lines are great for drawing the rough sketch of the overall composition, experimenting with elements you want to keep or delete in the final version and construction lines that you can erase once happy with the overall base drawing.
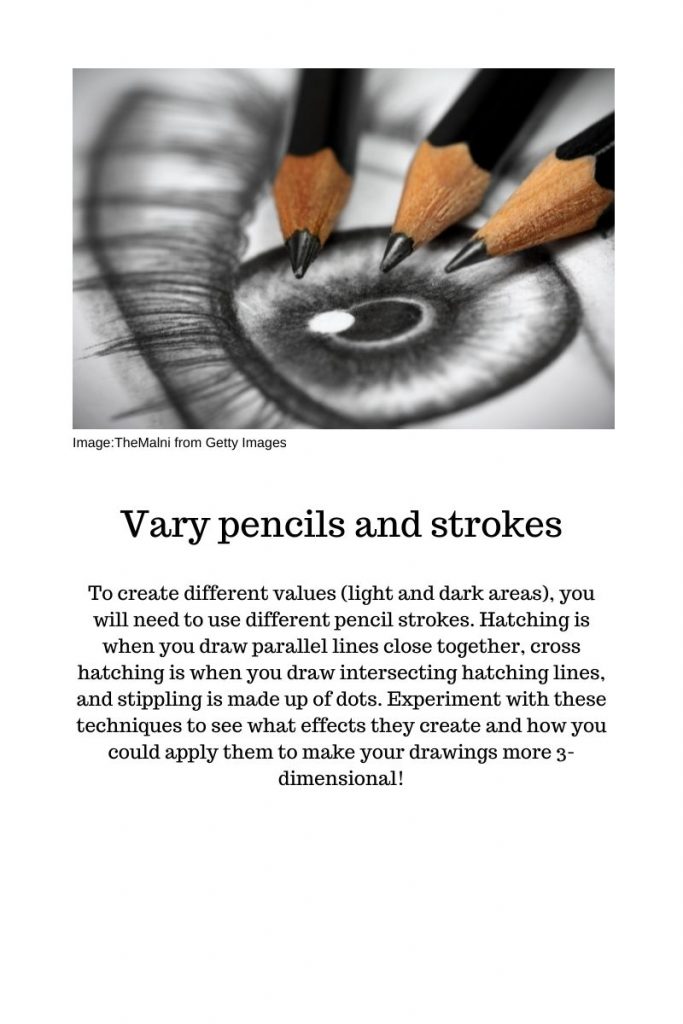
8. Experiment with light and dark pencil strokes to create depth and dimension in your drawings.
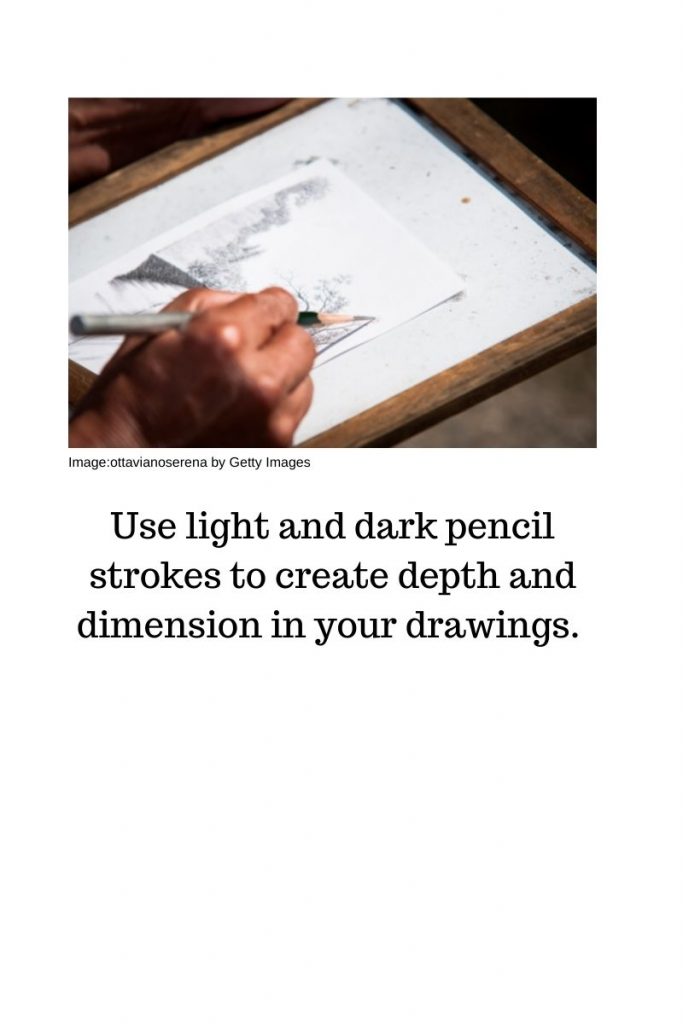
Use light and dark strokes to add depth and dimension to your drawings
Shading and making textural marks (mark-making) are one of the most important techniques in drawing as it can completely change the way your drawings look. Shading and textures can turn a two-dimensional drawing into a three dimensional one.
To create different tonal values (light and dark areas), you will need to use different pencil strokes. Hatching is when you draw parallel lines close together, cross hatching is when you draw intersecting hatching lines, and stippling is made up of dots. Experiment with these techniques to see what effects they create and how you can incorporate it into the subjects you create. More on that in the next point.
Mark-making to create textures involves various strokes from scribbling, stippling, and hatching that can be used with varying pencil pressure to create drawings that are incredibly realistic.
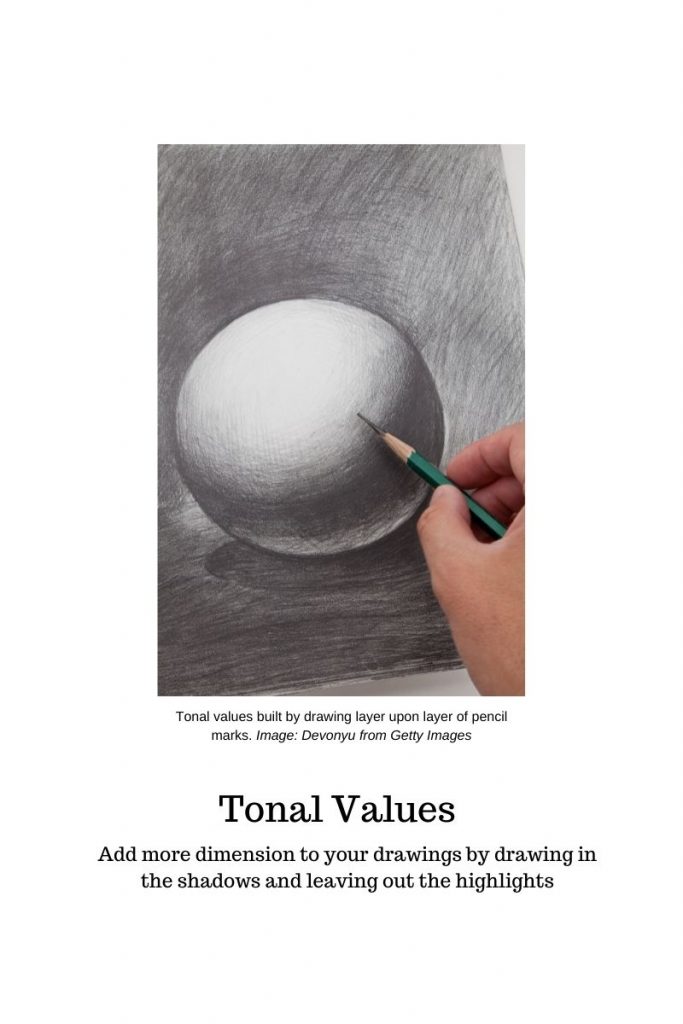
9. Add tonal values (shadows and highlights) to define shape and form
One of the most important things to consider when drawing is how to add tonal values. This simply means adding light and dark areas to your drawing to create a sense of depth and dimension. The simple concept behind it is to observe or imagine (if no reference photo available) how light would fall on an object if it were lit from a specific direction—and then drawing it accordingly!
There are several ways to add tonal values depending on your budget and skills. One of the cheapest and easiest way is to use a single HB or 2B pencil. When using just one pencil, you will need to gradually build up tonal intensity instead of simply varying pressure.
For example, if you want a light area, you will use a light touch with your pencil and light marks that are sparsely spaced. If you want a dark area, you will build up the darkness by drawing a few layers of marks using mark-making techniques such as hatching, cross-hatching or scumbling which are closely spaced. Hatching is when you draw parallel lines close together to create value or shading. Cross hatching is when you draw intersecting lines at different angles. This technique can be used to create both light and dark areas in your drawing depending on how close together or how far apart the lines or marks are drawn. The closer the lines are, the darker it will appear, and vice versa for lighter areas. This method works best can be used to add dimensionality to drawings.
DRAWING TIP: Avoid pressing harder as it will damage the paper and create awkward drawings.
You can also add tonal values by using different types of pencils. For example, if you want a very light area, you could use an HB or 2B pencil. Or if you want a very dark area, you could use a soft 6B or 8B black pencil to create marks and gradually build up tonal intensity.
Experiment with different techniques and find the ones that work best for you. And don’t forget to have fun!
10. Hold the pencil correctly
The way you hold a pencil while you draw can impact the results. For mark-making or drawing details which require more control, hold the pencil like you would while you write with a pen as it would give you more control and ability to vary pressure and pencil marks. But when you want to make gestural sketches or loose compositional of the overall subject, then hold the pencil away from the tip as that lends greater fluidity and enables light touch which is critical to build the foundations of drawing.
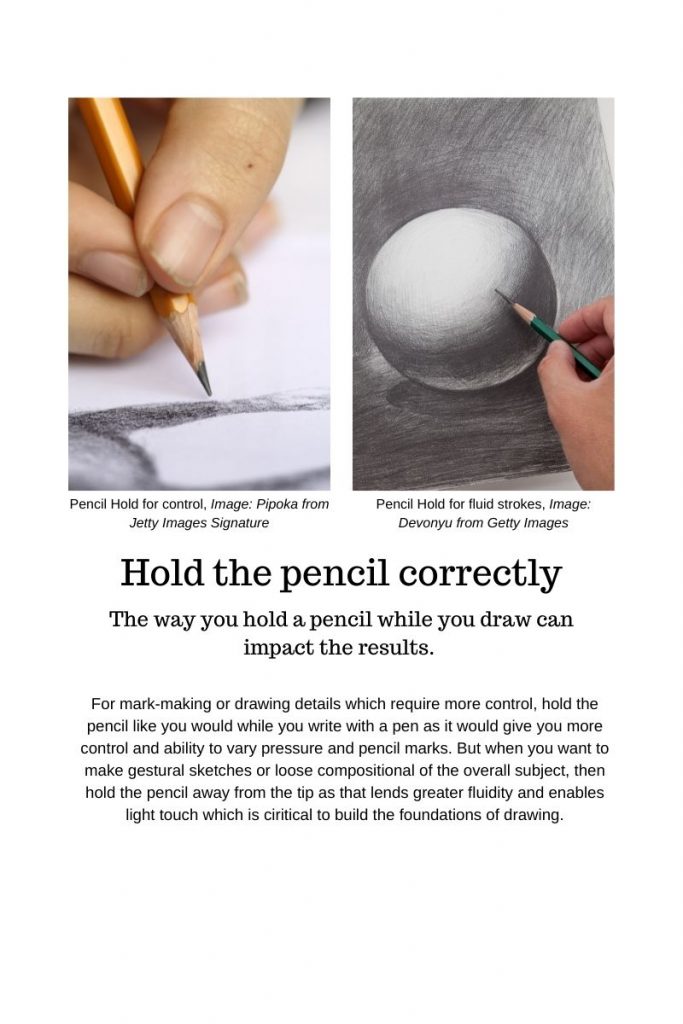
Learn to hold pencil as per different drawing strokes
Conclusion
That’s all for our tips on drawing better. We hope you’ve enjoyed this tutorial and that it’s helped you to hone your drawing skills. Remember to practice, practice, practice! The more time you spend working on your drawings the better they will become (we promise). Until next time, happy drawing!
ARE YOU IN PERTH? TRY OUT OUR THURSDAY ART CLASSES, PERTH running weekly at Frank Konency Community Centre from 10 am to 1 pm. BYO art materials. For more information, check this link: https://tranquilcanvas.com/art-classes-perth/
Warm regards
Soma M Datta
Founder of
P.S. Share the love – Do you have a friend who would enjoy this article? Send it to them and invite them to join my blog.
Share this page :
Do you have a tip to share for artist on a budget? Share them in your comments below :)!
Facebook
Twitter
Youtube
Instagram

Comments are closed